
After painstakingly completing the basics of both Arduino and Processing .Started to figure out how to make these two communicate with each other.
Arduino is a micro-controller with elaborated sensor i/o ports it lacks functionality of storing , retrieving data that is essential part of Internet Of Things.Therefore i came across the Processing IDE.
Arduino is a micro-controller with elaborated sensor i/o ports it lacks functionality of storing , retrieving data that is essential part of Internet Of Things.Therefore i came across the Processing IDE.
What is Processing ??
Processing is an open source programming language and development environment being accepted by visual arts and visual literacy communities since 2001.It brought technology and art together under one roof for the tinkerers.
Useful when you want those other computers to "talk" with an Arduino, for instance to display or save some data collected by the Arduino.
Useful when you want those other computers to "talk" with an Arduino, for instance to display or save some data collected by the Arduino.
In this tutorial you will learn:
- How to send data from Arduino to Processing over the serial port
- How to receive data from Arduino in Processing
- How to send data from Processing to Arduino
- How to receive data from Processing in Arduino
- How to write a serial ‘handshake’ between Arduino and Processing to control data flow
Arduino Serial Communication
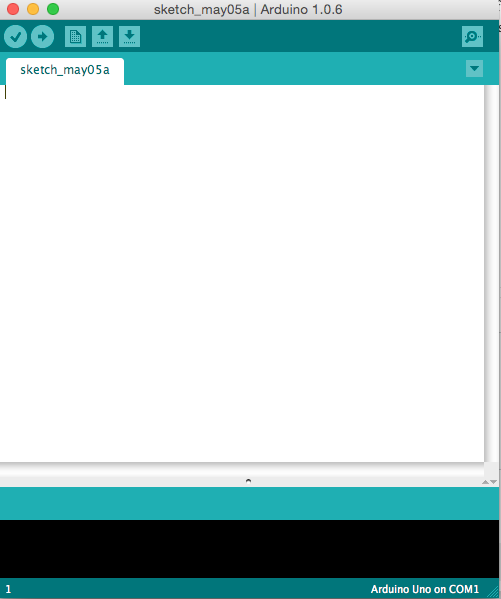
I'm skipping the part of getting started with Arduino you can check about that by clicking on the link.I am assuming you have installed Arduino IDE , a white sketch like this one appears when you run Arduino IDE.
This is a basic code for setting up serial communication between your computer and the arduino development board which houses an ATMEGA 328 micro-controller that communicates with our computer at a baud rate of 9600.For instance you can understand baud rate as the rate at which we are sending data to our computer.
void setup()
{
//initialise serial communications at a 9600 baud rate
Serial.begin(9600);
}
Note : If you're using mac then the serial port would be like this /dev/tty.usbmodem (for the Uno or Mega 2560) or /dev/tty.usbserial (for older boards)
After our setup() method, we need a method called loop(), which is going to repeat over and over as long as our program is running.In this method we will make Arduino communicate with our computer by sending a string "Hello World" every 100 millisecond. The code for loop () is below.
void loop()
{
//send 'Hello, world!' over the serial port
Serial.println("Hello, world!");
//wait 100 milliseconds
delay(100);
}
This is how the code should look like on sketch.
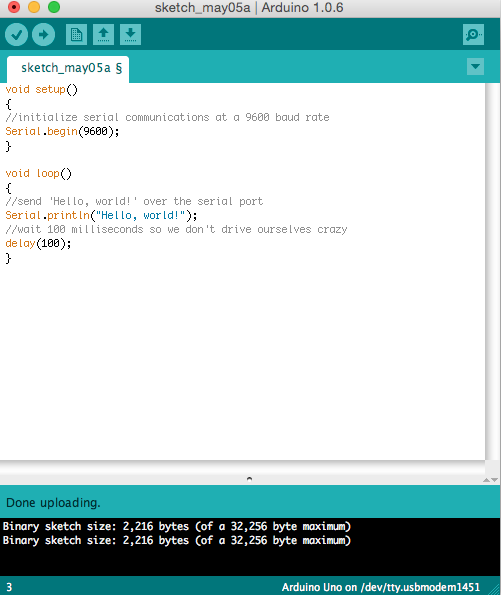
Now to make it work just plug in your arduino board select your board type (under Tools -> Board Type) and your Serial port (under Tools -> Serial Port) and hit the ‘upload’ button to load your code onto the Arduino.
We are moving to the next part where processing will detect the data being sent from arduino over serial comm port. For that you should have Processing IDE downloaded.
We are moving to the next part where processing will detect the data being sent from arduino over serial comm port. For that you should have Processing IDE downloaded.
Processing to receive and detect what Arduino sent
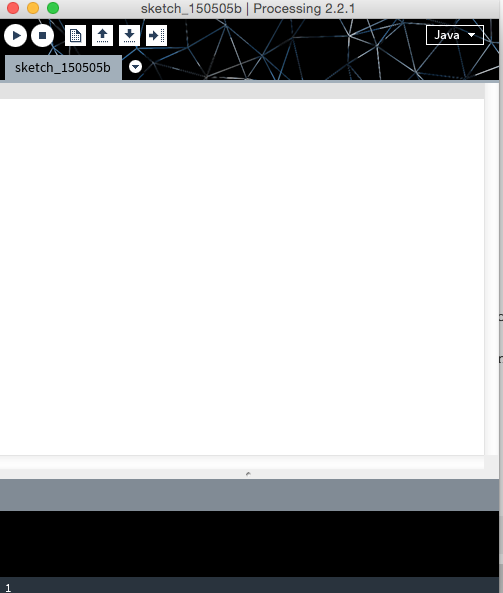
The Processing IDE looks very much similar to Arduino IDE and it also has only two methods void setup () and void draw (). Processing IDE comes with a Serial library to facilitate such communication.
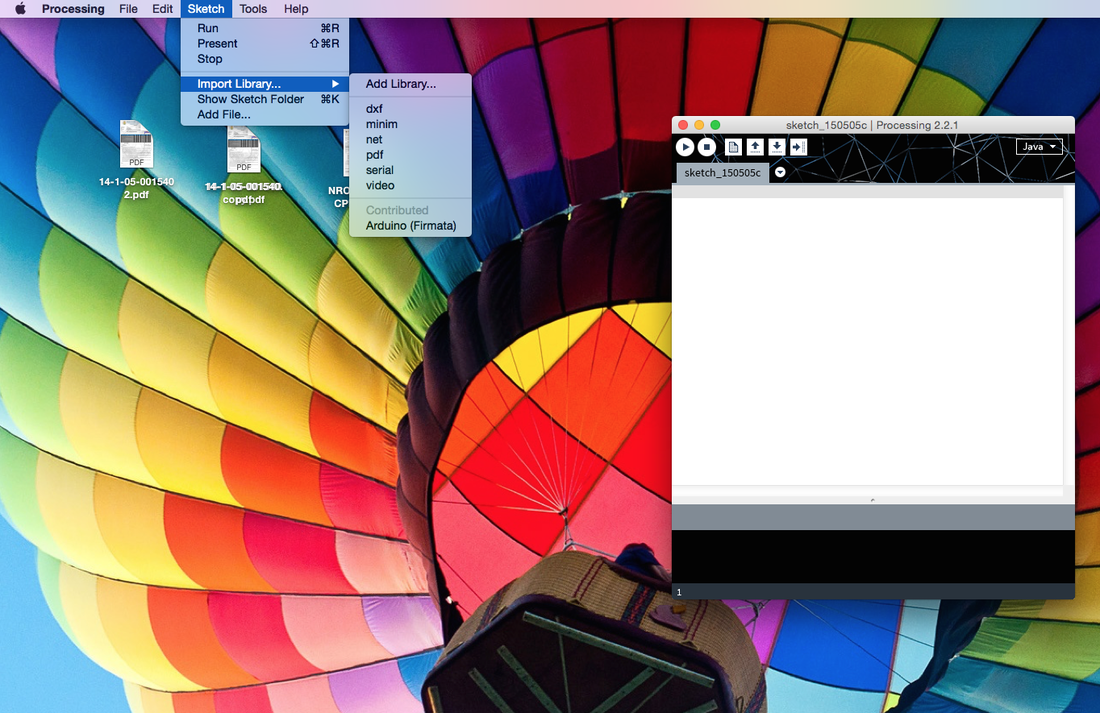
Once we have an open sketch, our first step is to import the Serial library. Go to Sketch->Import Library->Serial, as shown below:
Once we have an open sketch, our first step is to import the Serial library. Go to Sketch->Import Library->Serial, as shown below:
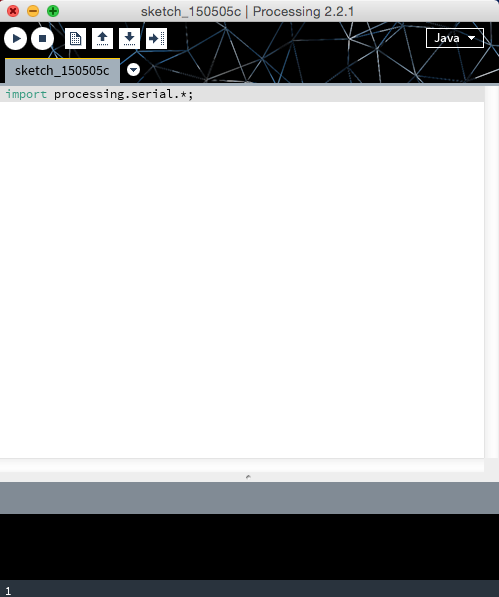
You should now see a line like import processing.serial.*; at the top of your sketch. Just like the image below.
Underneath our import statement we need to declare some global variables. Add these two lines beneath the import statement:
Serial myPort; // Create object from Serial class
String val; // Data received from the serial port
Underneath our import statement we need to declare some global variables. Add these two lines beneath the import statement:
Serial myPort; // Create object from Serial class
String val; // Data received from the serial port
In order to listen to any serial communication we have to get a Serial object (we call it myPort but you can it whatever you like), which lets us listen in on a serial port on our computer for any incoming data. We also need a variable to recieve the actual data coming in. In this case, since we’re sending a String (the sequence of characters ‘Hello, World!’) from Arduino, we want to receive a String in Processing.
For our setup() method in Processing, we’re going to find the serial port our Arduino is connected to and set up our Serial object to listen to that port.
void setup()
{
String portName = Serial.list()[2]; //change the 0 to a 1 or 2 etc. to match your port
myPort = new Serial(this, portName, 9600);
}
In order to avoid any confusions put 9600 baud rate in the last argument of our Serial object so that it matches with the baud rate of Arduino as mentioned in Serial.begin(9600) statement (Arduino sketch).
In our draw() loop, we’re going to listen in on our Serial port and when we get something, stick that something in our val variable and print it to the console (that black area at the bottom of your Processing sketch).
void draw()
{
if ( myPort.available() > 0)
{ // If data is available,
val = myPort.readStringUntil('\n'); // read it and store it in val
}
println(val); //print it out in the console
}
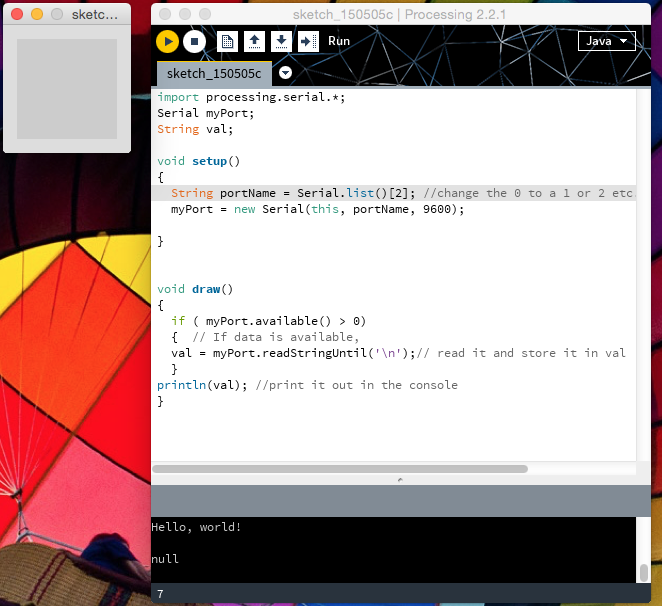
If you hit the ‘run’ button (and your Arduino is plugged ), you should see a little window pop-up, and after a sec you should see `Hello, World!‘ appear in the Processing console. Over and over. Like this:
For our setup() method in Processing, we’re going to find the serial port our Arduino is connected to and set up our Serial object to listen to that port.
void setup()
{
String portName = Serial.list()[2]; //change the 0 to a 1 or 2 etc. to match your port
myPort = new Serial(this, portName, 9600);
}
In order to avoid any confusions put 9600 baud rate in the last argument of our Serial object so that it matches with the baud rate of Arduino as mentioned in Serial.begin(9600) statement (Arduino sketch).
In our draw() loop, we’re going to listen in on our Serial port and when we get something, stick that something in our val variable and print it to the console (that black area at the bottom of your Processing sketch).
void draw()
{
if ( myPort.available() > 0)
{ // If data is available,
val = myPort.readStringUntil('\n'); // read it and store it in val
}
println(val); //print it out in the console
}
If you hit the ‘run’ button (and your Arduino is plugged ), you should see a little window pop-up, and after a sec you should see `Hello, World!‘ appear in the Processing console. Over and over. Like this:
Now we have successfully achieved Arduino to Processing communication now its time for flip side to initiate the same procedure and setup a communication from Processing to Arduino.
Processing talks back to Arduino
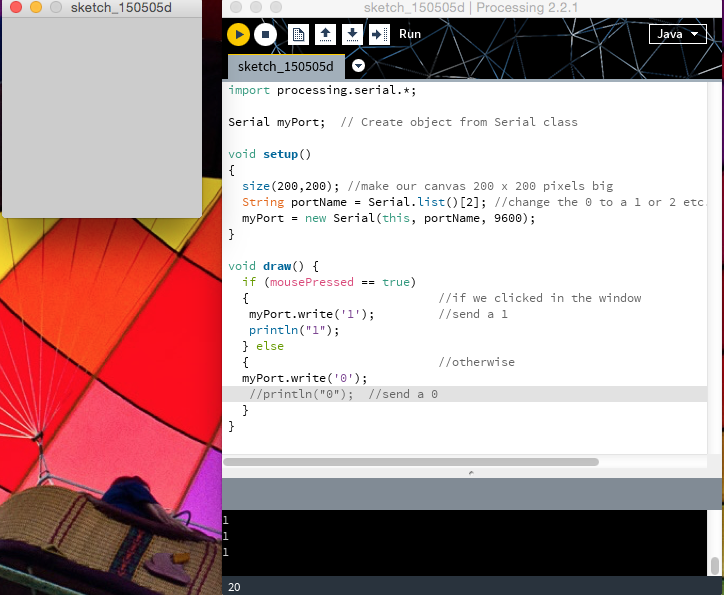
There are no major changes in processing sketch.First import the Serial library and declare the global serial object varibale and in our setup()method we find our port and initialize Serial communication on that port with our Serial variable at 9600 baud rate. We’re also going to use the size() command, to give us a little window to click in, which will trigger our sketch to send something over the Serial port to Arduino.
import processing.serial.*;
Serial myPort; // Create object from Serial class
void setup()
{
size(200,200); //make our canvas 200 x 200 pixels
String portName = Serial.list()[0]; //change the 0 to a 1 or 2 etc. to match your port
myPort = new Serial(this, portName, 9600);
}
In our draw() loop, we send whatever we want over the serial port by using the write method from the Processing Serial library. For this sketch, we will send a ‘1’ whenever we click our mouse in the Processing window. We’ll also print it out on the console, just to see that we’re actually sending something. If we aren’t clicking we’ll send a ‘0’ instead.
void draw()
{
if (mousePressed == true)
{ //if we clicked in the window
myPort.write('1'); //send a 1
println("1");
} else
{ //otherwise
myPort.write('0');
println("0"); //send a 0
}
}
Catching 1's at Arduino end
In order to detect the incoming 1s from Processing at communication port of Arduino we need external hardware a LED at pin 13 (Say) which will glow as it encounters "1 ".
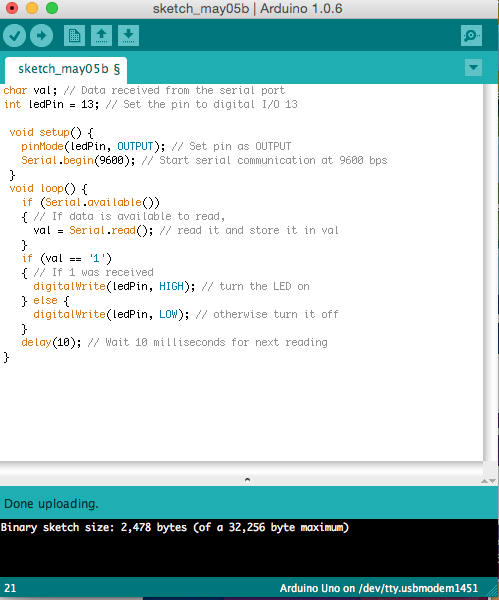
At the top of our Arduino sketch, we need two global variables - one for holding the data coming from Processing, and another to tell Arduino which pin our LED is hooked up to.
char val; // Data received from the serial port
int ledPin = 13; // Set the pin to digital I/O 13
Next, in our setup() method, we’ll set the LED pin to an output, since we’re powering an LED, and we’ll start Serial communication at 9600 baud rate.
void setup()
{
pinMode(ledPin, OUTPUT); // Set pin as OUTPUT
Serial.begin(9600); // Start serial communication at 9600 bps
}
Finally, in the loop() method, we’ll look at the incoming serial data. If we see a ‘1’, we set the LED to HIGH (or ON), and if we don’t (e.g. we see a ‘0’ instead), we turn the LED OFF. At the end of the loop, we put in a small delay to help the Arduino keep up with the serial stream.
void loop()
{
if (Serial.available())
{ // If data is available to read
val = Serial.read(); // read it and store it in val
} if (val == '1') { // If 1 was received
digitalWrite(ledPin, HIGH); // turn the LED on
} else {
digitalWrite(ledPin, LOW); // otherwise turn it off
}
delay(10); // Wait 10 milliseconds for next reading
}
This is how the code would look in Arduino sketch.Now run the code in Processing sketch and click anywhere in the canvas the LED on 13th pin will glow when you will click.Now we can communicate via processing with Arduino.
Handshaking
So far we were doing it in half duplex mode one sending and another one listening then repeating vice versa.But we want both Processing and Arduino to communicate simultaneously this is called Serial Handshaking i.e full duplex mode.
In this part, we’re going to combine our two previous examples in such a way that Processing can both receive ‘Hello, world!’ from Arduino and send a 1 back to Arduino to toggle an LED. Of course, this also means that Arduino has to be able to send ‘Hello, world!’ while listening for a 1 from Processing.
Let's get started.
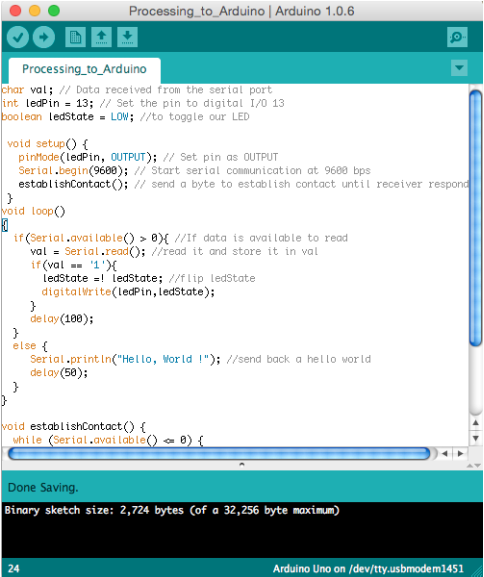
Again like the previous code we need a variable to hold data coming from serial port and a variable for state of led.
In our code we only listen for 1’s, and each time we hear a ‘1’ we toggle the LED on or off. To do this we added a boolean (true or false) variable for the HIGH or LOW state of our LED. This means we don’t have to constantly send a 1 or 0 from Processing, which frees up our serial port , quite a bit.There is introduction of this new function establishContact();
char val; // Data received from the serial port
int ledPin = 13; // Set the pin to digital I/O 13
boolean ledState = LOW; //to toggle our LED
void setup()
{
pinMode(ledPin, OUTPUT); // Set pin as OUTPUT
//initialize serial communications at a 9600 baud rate
Serial.begin(9600);
establishContact(); // send a byte to establish contact until receiver responds
}
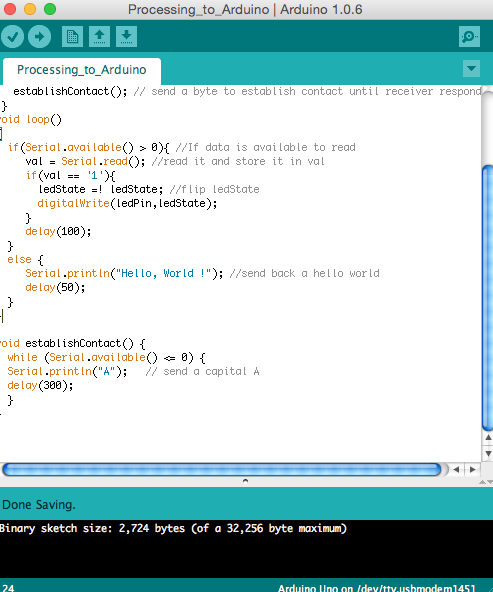
In the loop() function we have made changes in code for LED as now it will toggle according to '!' that means every time it encounters a '!' the ledState will set the boolean to the opposite of what it was before (so LOW becomes HIGH or vice-versa). We will send "Hello,World ! "only when we see a 1 coming in.T lherefore its now placed in else loop.
void loop()
{
if (Serial.available() > 0) { // If data is available to read,
val = Serial.read(); // read it and store it in val
if(val == '1') //if we get a 1
{
ledState = !ledState; //flip the ledState
digitalWrite(ledPin, ledState);
}
delay(100);
}
else {
Serial.println("Hello, world!"); //send back a hello world
delay(50);
}
}
Now we get to that establishContact() function we had put in our setup() method before. This function just sends out a string (the same one we’ll need to look for in Processing) to see if it hears anything back - indicating that Processing is ready to receive data.
void establishContact() {
while (Serial.available() <= 0) {
Serial.println("A"); // send a capital A
delay(300);
}
}
In this part, we’re going to combine our two previous examples in such a way that Processing can both receive ‘Hello, world!’ from Arduino and send a 1 back to Arduino to toggle an LED. Of course, this also means that Arduino has to be able to send ‘Hello, world!’ while listening for a 1 from Processing.
Let's get started.
Again like the previous code we need a variable to hold data coming from serial port and a variable for state of led.
In our code we only listen for 1’s, and each time we hear a ‘1’ we toggle the LED on or off. To do this we added a boolean (true or false) variable for the HIGH or LOW state of our LED. This means we don’t have to constantly send a 1 or 0 from Processing, which frees up our serial port , quite a bit.There is introduction of this new function establishContact();
char val; // Data received from the serial port
int ledPin = 13; // Set the pin to digital I/O 13
boolean ledState = LOW; //to toggle our LED
void setup()
{
pinMode(ledPin, OUTPUT); // Set pin as OUTPUT
//initialize serial communications at a 9600 baud rate
Serial.begin(9600);
establishContact(); // send a byte to establish contact until receiver responds
}
In the loop() function we have made changes in code for LED as now it will toggle according to '!' that means every time it encounters a '!' the ledState will set the boolean to the opposite of what it was before (so LOW becomes HIGH or vice-versa). We will send "Hello,World ! "only when we see a 1 coming in.T lherefore its now placed in else loop.
void loop()
{
if (Serial.available() > 0) { // If data is available to read,
val = Serial.read(); // read it and store it in val
if(val == '1') //if we get a 1
{
ledState = !ledState; //flip the ledState
digitalWrite(ledPin, ledState);
}
delay(100);
}
else {
Serial.println("Hello, world!"); //send back a hello world
delay(50);
}
}
Now we get to that establishContact() function we had put in our setup() method before. This function just sends out a string (the same one we’ll need to look for in Processing) to see if it hears anything back - indicating that Processing is ready to receive data.
void establishContact() {
while (Serial.available() <= 0) {
Serial.println("A"); // send a capital A
delay(300);
}
}
Now that we are done with Arduino part , it's time for amendments in Processing sketch.The code is pretty much similar but minor changes and introduction of serialEvent() method which basically gets called every time we see a specific character in our serial buffer which acts as a delimiter as it tells processing - We're done with this chunk of data which in our case is Hello,World !
In the beginning of our code there is introduction of a boolean firstContact to mark us when we made our very much first contact with Arduino.The code snippets are below:
import processing.serial.*; //import the Serial library
Serial myPort; //the Serial port object
String val;
// since we're doing serial handshaking,
// we need to check if we've heard from the microcontroller
boolean firstContact = false;
Our setup() function is the same as it was for our serial write program, except we added the myPort.bufferUntil('\n'); line. This let’s us store the incoming data into a buffer, until we see a specific character we’re looking for. In this case, it’s a carriage return (\n) because we sent a Serial.println from Arduino. The ‘ln’ at the end means the String is terminated with a carriage return, so we know that’ll be the last thing we see.
void setup() {
size(200, 200); //make our canvas 200 x 200 pixels big
// initialize your serial port and set the baud rate to 9600
myPort = new Serial(this, Serial.list()[4], 9600);
myPort.bufferUntil('\n');
}
Because we’re continuously sending data, our serialEvent() method now acts as our newdraw() loop, so we can leave it empty:
void draw() {
//we can leave the draw method empty,
//because all our programming happens in the serialEvent (see below)
}
serialEvent(). Each time we see a carriage return this method gets called. We need to do a few things each time to keep things running smoothly.
void serialEvent( Serial myPort) {
//put the incoming data into a String -
//the '\n' is our end delimiter indicating the end of a complete packet
val = myPort.readStringUntil('\n');
//make sure our data isn't empty before continuing
if (val != null) {
//trim whitespace and formatting characters (like carriage return)
val = trim(val);
println(val);
//look for our 'A' string to start the handshake
//if it's there, clear the buffer, and send a request for data
if (firstContact == false) {
if (val.equals("A")) {
myPort.clear();
firstContact = true;
myPort.write("A");
println("contact");
}
}
else { //if we've already established contact, keep getting and parsing data
println(val);
if (mousePressed == true)
{ //if we clicked in the window
myPort.write('1'); //send a 1
println("1");
}
// when you've parsed the data you have, ask for more:
myPort.write("A");
}
}
}
If you’ve got your Arduino code finished and loaded onto your board, try running this sketch. You should see ‘Hello, world!’ coming in on the console, and when you click in the Processing window, you should see the LED on pin 13 turn on and off. Success!
Consolidated Processing code:
import processing.serial.*; // Import the Serial library
Serial myPort; //The Serial port object
String val;
// Since we are doing a serial handshaking so we need to know
// if we heard from microcontroller or not ?
boolean firstContact = false;
void setup() {
size(200, 200); //make our canvas 200 x 200 pixels big
// initialize your serial port and set the baud rate to 9600
myPort = new Serial(this, Serial.list()[2], 9600);
myPort.bufferUntil('\n');
}
void draw() {
//we can leave the draw method empty,
//because all our programming happens in the serialEvent (see below)
}
void serialEvent( Serial myPort) {
//put the incoming data into a String -
//the '\n' is our end delimiter indicating the end of a complete packet
val = myPort.readStringUntil('\n');
//make sure our data isn't empty before continuing
if (val != null) {
//trim whitespace and formatting characters (like carriage return)
val = trim(val);
println(val);
//look for our 'A' string to start the handshake
//if it's there, clear the buffer, and send a request for data
if (firstContact == false) {
if (val.equals("A")) {
myPort.clear();
firstContact = true;
myPort.write("A");
println("contact");
}
}
else { //if we've already established contact, keep getting and parsing data
println(val);
if (mousePressed == true)
{ //if we clicked in the window
myPort.write('1'); //send a 1
println("1");
}
// when you've parsed the data you have, ask for more:
myPort.write("A");
}
}
}
Now, If you want to send over a number of sensor values, it’s a good idea to count how many bytes you’re expecting so you know how to properly parse out the sensor data.
Resource :
- For Arduino : http://www.arduino.cc/en/Guide/HomePage
- About Arduino UNO : http://www.arduino.cc/en/Main/ArduinoBoardUno
- http://learning.codasign.com/index.php?title=Beginning_Processing_and_Arduino
- http://playground.arduino.cc/Interfacing/Processing
 RSS Feed
